Creating an A/R Account
Create accounts receivable (A/R) account for organizations with repeated reservations at the property or businesses that host events at the property. Use these accounts to create invoices, set payment terms, create statements, and set credit limits.
Navigate to Reservations ➜ Profiles. The Search page opens with the Profiles tab selected.
Type the full or partial name of the company that users want to find in the Search box
Click Go. The profiles that match the search query appear on the Profiles tab.
Select the company for which users want to create an accounts receivable (A/R) account, and then click the Accounts Receivable tab.
When prompted to create a new account, click Yes.
Select an Account Contact for the company and its reservations—the account contact information auto-populates from the company profile.
Contacts that are saved to the company profile appear in the Account Contacts list.
Select the Preferred communication method for receipt of account invoices and statements, either Email or Print.
Select the Create custom account number check box if the property has an account number convention that they follow. If users select this check box, type the custom number in the Account # field that appears. If users don't select this check box, the account number will be generated for users by Stay when users save.
Type a Credit Limit to set the maximum amount of charges posted to the A/R account.
Select the standard Terms for this account: 30, 60, 90, or 120 days. Terms begin on the property date when the invoice is created.
Assign a default routing rule to the account if a routing rule is already available.
Users can create custom routing rules for each AR account by clicking Custom Rule option (Company Profile ➜ Accounts Receivable ➜ Assign a Default Rule ➜ Custom Rule). This will automatically be inherited by each reservation. Pre-configured routing rule templates can be selected from the Select Template drop-down list in the Edit Routing Rule screen which automatically fill-in the custom rules for an AR account. This makes it easier to add the same routing rules across multiple AR accounts. This feature setting, Enhanced Routing Rule must be enabled for this feature.
Enter the validity dates for the AR account in the Start Date and End Date fields. For newly created account, the account creation date will be automatically populated as the start date. For existing accounts, users can choose any date as the start date. The AR accounts become discrepant when the validity ends.
The dates selected in this screen will be displayed in the AR Account Default Settings screen.
To manage and apply settings for all properties, configure the validity start and end dates in the Settings screen in the All Properties tab. The dates selected in this screen will be applicable for the AR account in all the properties that belong to the same customer.
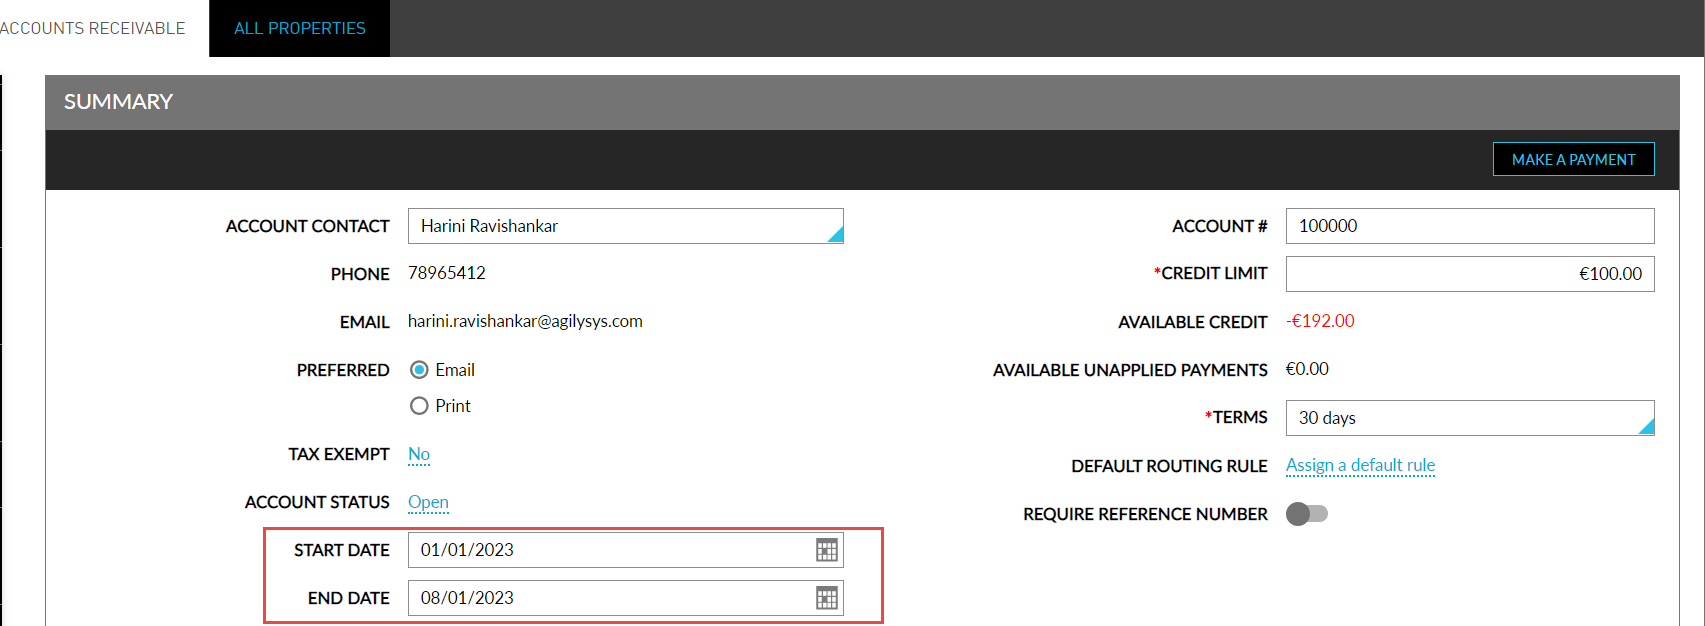
Enable Require Reference Number for collecting reference numbers like the CLC Lodging CheckINN Card number during direct bill payments.
Click Save. A list of tabs appears on the right side of the Accounts Receivable page, and the Tax Exempt and Account Status fields become editable.
-
Settings - allows users to make any other account settings as needed.
-
Non-Invoiced - allows users to add non-invoiced charges or credits to the account.
-
Unapplied Payments - allows users to take payments in AR accounts (non-invoiced) and apply them to one or more invoices.
-
Invoices - allows users to create invoices for the account with one or more non-invoiced charges.
-
History - allows users to view a log of the account activities.
-
Comments - allows users to view a log of invoice comments. For example, comments about receiving deposits, disputed charges or granting write-offs. Comments typed on the A/R Settings page don’t appear on the invoice.
When saving the validity dates, the active reservations and groups that fall outside of these dates will be displayed in the Overlapping Reservations & Groups screen. This screen displays the following information:
-
Reservations tab:
-
Property: displays the name of the property associated with the reservation that falls outside the validity dates of the AR account
-
Confirmation Number: displays the confirmation number of the reservation
-
Guest Name: displays the guest name associated with the reservation
-
Arrival Date: displays the arrival date of the reservation
-
Departure Date: displays the departure date of the reservation
-
Groups tab:
-
Property: displays the name of the property associated with the group that falls outside the validity dates of the AR account
-
Group Name: displays the name of the group
-
Group Code: displays the group’s code
-
Arrival Shoulder Date: displays the arrival shoulder date set for the group
-
Arrival Date: displays the group’s arrival date
-
Departure Date: displays the group’s departure date
-
Departure Shoulder Date: displays the departure shoulder date set for the group
If the user clicks Confirm, the modified dates will be saved. Else, if user clicks Do Not Update Dates, the modified dates will not be saved.
If the organization can incur charges without taxes, select the Tax Exempt link, type the Tax ID, and select tax exemptions.
Select an account Status. The account cannot be closed if there are open invoices or non-invoiced charges. Add a Comment about any status change for tracking purposes.